Why This Blog Exists: Breathing Life into Old Junk
By Chris Slothouber
I found a bare vacuum fluorescent display on AliExpress for a price I couldn't refuse and immediately wanted to know if I could bring it back to life. No power supply. No interface board. Just a 256x48 VFD panel with that blue-green glow old hardware has when it still feels a little bit magical.
That instinct is a pretty reliable way to end up deep in the kind of work I do now: part bench work, part detective work, part supply-chain problem, part systems integration. This project started as "see if the old display still works" and turned into my first serious dive into having a board assembled instead of soldering the whole thing myself.
The Problem Was Never Just the Display
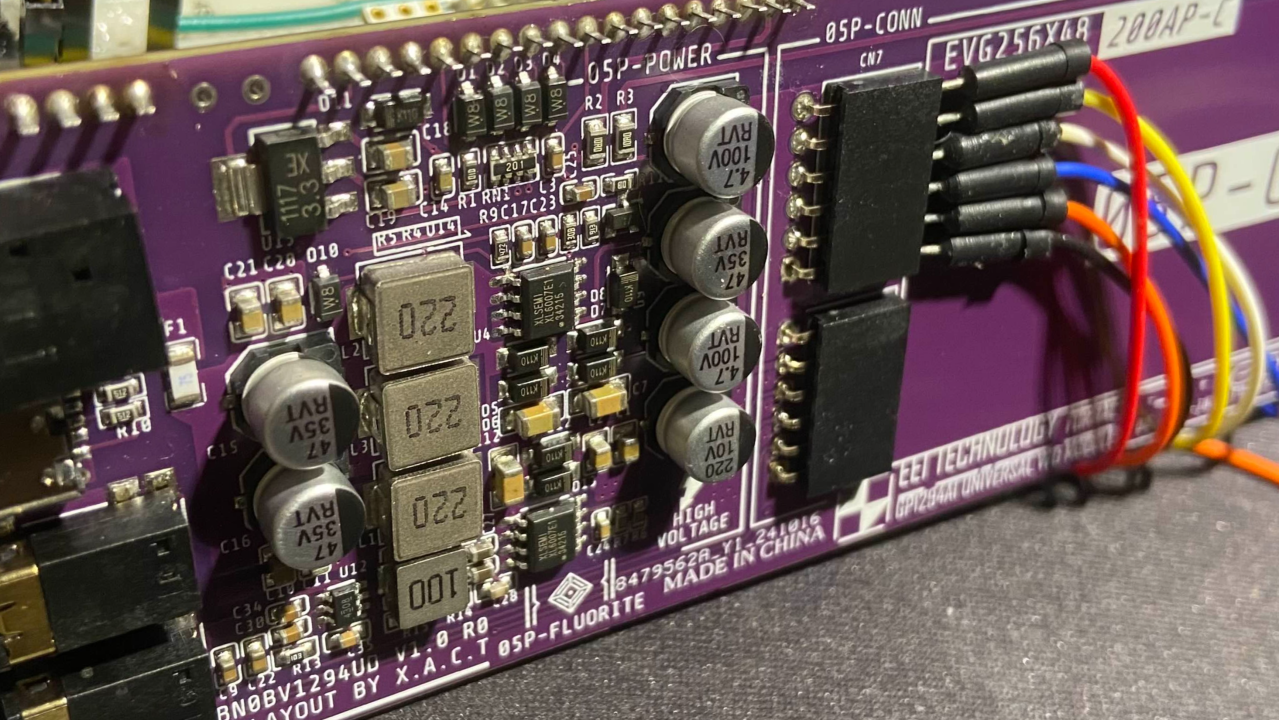
The panel was only the beginning. A VFD like this does not behave like something you casually wire up and start printing pixels to. It needed a driver circuit, high-voltage support, and a clean way to tell it what to light.
The design I finally found was promising, but it lived on the website of a Chinese PCBA manufacturer and the documentation was entirely in Chinese. So the job became: translate what mattered, figure out the design intent, and extract the artifacts I could actually use. Gerbers. Pick-and-place data. BOM. Enough truth to move from "interesting old part" to "buildable system."
That kind of work never shows up in the polished version of engineering. Nobody puts "spent an evening stumbling through translated menus and spreadsheets until the supply chain started making sense" on the hero shot. But that is the work. Not just schematic capture or firmware. Translation, sourcing, judgment, and persistence.
Why I Didn't Assemble This One by Hand
I could have ordered bare boards and placed every component myself, but this board packed a lot of parts into a tight footprint and included the high-voltage circuitry the display needed. Hand soldering it would have been slow, error-prone, and a good way to learn the wrong lesson.
So I tried something new: have the board assembled. That sounds simple right up until the point where you have to make it happen. File submission was the easy part. The real learning started once the spreadsheets showed up and the available parts kept changing underneath the design.
JLCPCB was the right fit for this one, partly because of cost and timing, partly because the original design had already been built in that ecosystem. Even then, it was still a lot of back-and-forth: verifying footprints, confirming substitutions, watching inventory move around, and coordinating across time zones while key people were out of office. A board order sounds clean from far away. Up close it looks like logistics, spreadsheets, and a bunch of small decisions that keep the project from stalling.
The Part That Forced Me to Understand the Design
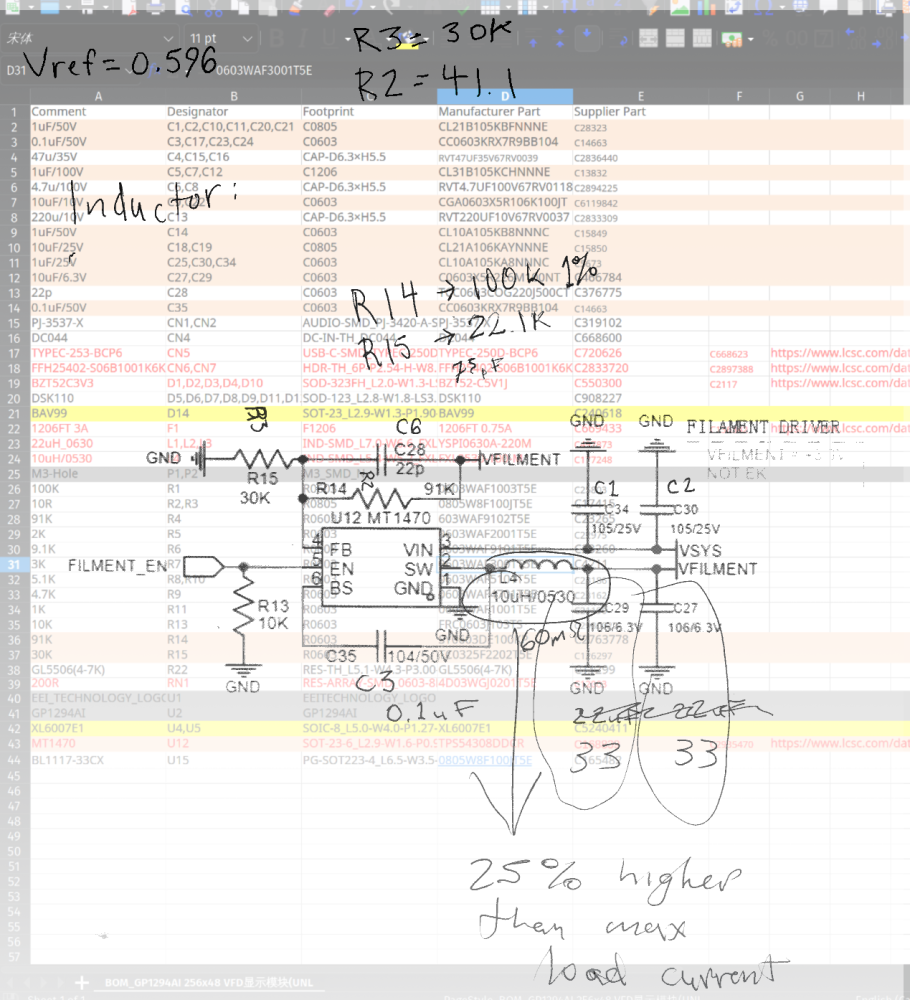
The biggest snag was the MT1470 buck converter. It wasn't available for assembly, and it was not an optional part. That meant I either found a substitute that fit the design constraints or the whole project stopped there.
That sent me into the datasheets. I needed to understand what the original part was doing, compare it against what JLCPCB actually had in stock, and figure out whether a replacement would behave the same way in the circuit instead of just fitting the footprint.
By the time I landed on the TPS54308, the problem had changed shape again. The package worked. The function matched. But the recommended feedback-divider values were different, which meant updating the resistor choices so the output voltage stayed where it needed to be.
Tip
The interesting part was not just finding a pin-compatible replacement. It was understanding enough of the original intent to know which differences mattered and which ones didn't.
That is the kind of engineering I trust most now. Not "the part number changed," but "what job was this block doing, what constraints does it actually have, and how do we keep moving without pretending those are the same question?"
The Moment It Became Real
When the assembled board finally arrived, all the translation work, component checks, substitution math, and manufacturing friction collapsed back into something much simpler: solder the salvaged display onto the new driver board and see if it lives.
And it did.
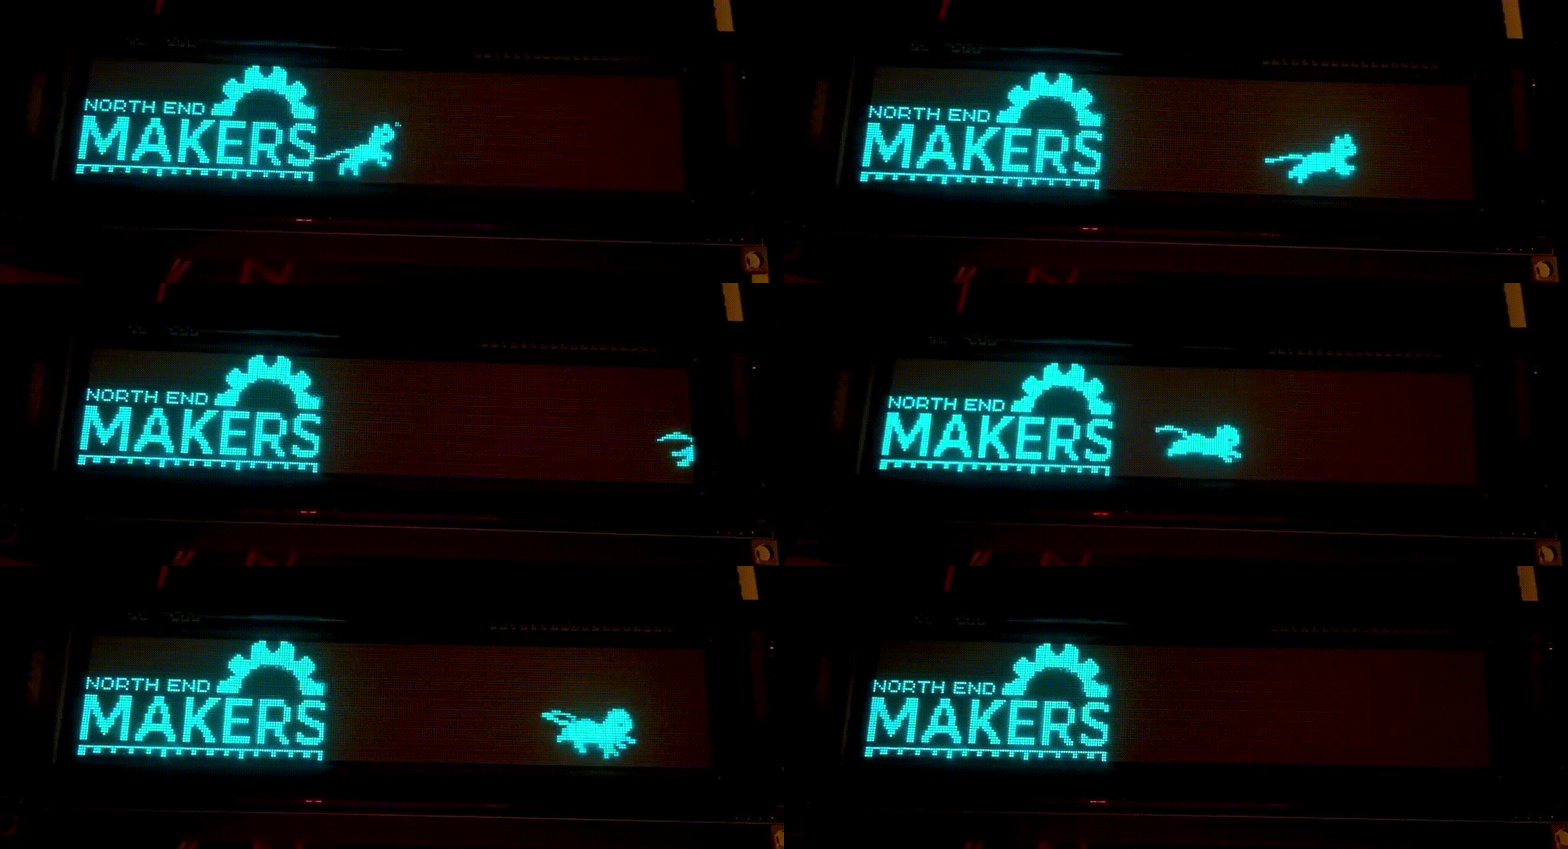
Bright pixels. Clean output. A ridiculous amount of satisfaction from watching a piece of abandoned hardware become useful again. I even loaded a cat animation onto it because if you're going to resurrect old display hardware, you should give it something worthy to do on day one.
Warning
Update April 14, 2026: A few leftover assemblies from this run are now available in the PixelWise shop. Same display, same driver board, same hand-soldered Seattle final assembly.
Outcome
This project reinforced a few things I keep seeing across domains: real engineering includes translation, substitutions, procurement, timing, and judgment. The interesting problems live between the clean categories. Curiosity still doesn't need to pick a lane.
Why This Blog Exists
This is the kind of work PixelWise is built around. Hardware, firmware, software, AI, and the messy handoffs between them. Sometimes the problem is on the bench. Sometimes it is in a datasheet. Sometimes it is buried in a BOM, a manufacturing workflow, or a decision somebody thought was too small to matter.
This blog is where I write that work down. Not thought leadership. Not predictions. What happened, what changed, what broke, what worked, and what the system looked like from inside while it was happening.
If a project starts with a salvaged part and ends with a functioning system, or starts as a software issue and turns out to be a board-level one, it belongs here.
Inside the machine, on purpose.